This tutorial covers the full creation of a complex product with two rate types (Adult + Child), several time slots, and stock by time slot. Environment: Tourbiz (Activity).
🧭 Process overview
- Create the product and its basic information
- Set the time slots (several slots)
- Set up the prices (Adult + Child groups)
- Create the shared stock and attach it to the product
- Check the availability calendar
✅ Quick summary
| Step | Where | Key action |
|---|---|---|
| 1 | Products › Information | Name, Internal name, Supplier |
| 2 | Product › Time slots | Service time slot = Yes + several slots |
| 3 | Product › Prices | Group with Adult + Child types |
| 4 | Product availability | Create the stock, attach the product, stock varies by time slot = Yes |
| 5 | Stock › Management | Check the calendar (Open / Critical / Out of stock) |
Step 1 — Create the product (Information tab)
- Menu Activity › Products.
- At the top right, click + Add.
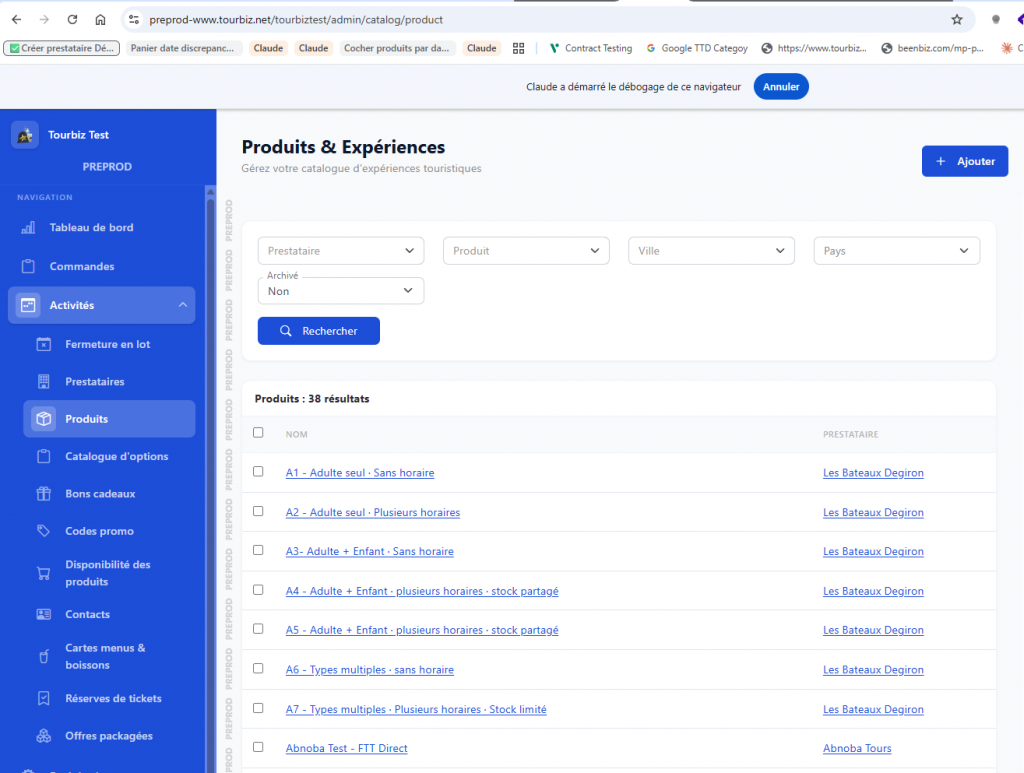
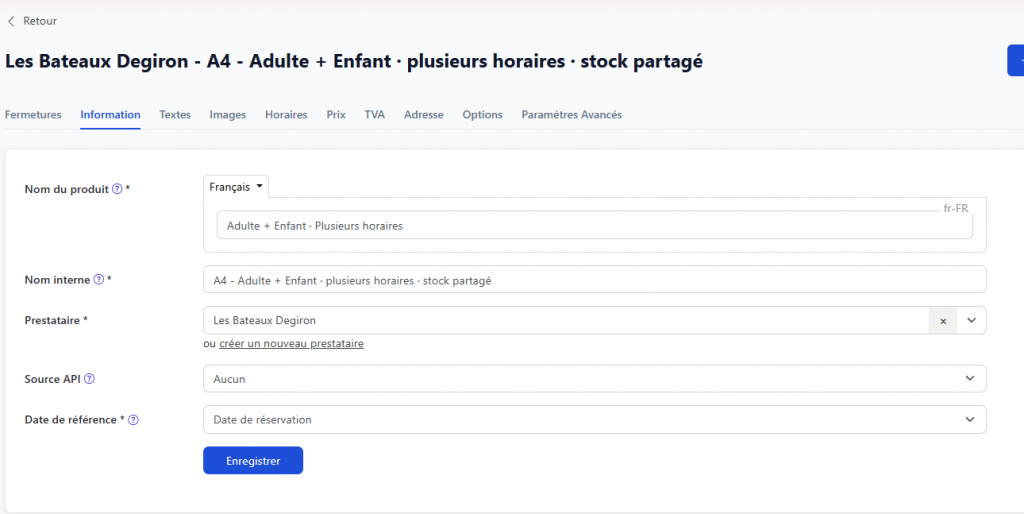
- Fill in the Information tab:
| Field | Description |
|---|---|
| Product name * | Public name shown to customers (multilingual field). E.g.: Adult + Child · Several time slots. |
| Internal name * | Name used in the back office to find it easily. E.g.: A4 – Adult + Child · several time slots · shared stock. |
| Supplier * | Select the supplier (e.g. Les Bateaux Degiron). You can also create a new supplier. |
| API source | Origin of the product. Leave as None for a manually created product. |
| Reference date * | Basis for calendar calculations (in most cases, leave as Booking date). |
- Click Save. The other tabs then become fully usable.
ℹ️ Tabs available on the product sheet: Closures · Information · Texts · Images · Time slots · Prices · VAT · Address · Options · Advanced Settings.
Step 2 — Set the time slots (Time slots tab)
This is where you configure “several time slots.”
- Open the Time slots tab.
- Service time slot → select Yes.
- In Time slot list, fill in for each slot:
- Activity start * (e.g. 9:00 AM)
- Meeting time (optional)
- Activity end (optional)
- Click + Add a time slot for each additional slot (e.g. 9:00, 10:00, 11:00, 12:00).
- Save each slot.
💡 The Manage informational times link lets you make secondary times (meeting time OR end time) visible, particularly on widgets.
Step 3 — Set up prices (Prices tab)
This is where you create the “Adult + Child” setup.
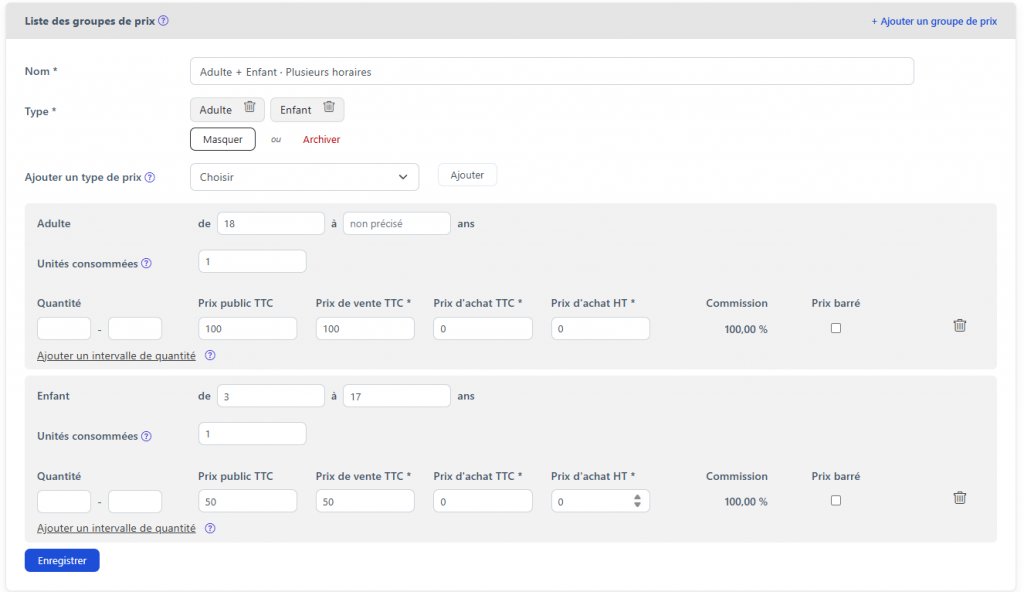
- Open the Prices tab → Price group list block.
- Name: name the group (e.g. Adult + Child · Several time slots).
- Type: add the rate types via Add a price type (Choose list → Add). You’ll end up with two blocks: Adult and Child.
For each type, set:
| Setting | Adult | Child |
|---|---|---|
| Age range (from … to … years) | e.g. 18 → not set | e.g. 3 → 17 |
| Units consumed | 1 | 1 |
| Quantity (min-max range) | free | free |
| Public price incl. tax | e.g. 100 | e.g. 50 |
| Selling price incl. tax * | e.g. 100 | e.g. 50 |
| Purchase price incl. tax * | e.g. 0 | e.g. 0 |
| Purchase price excl. tax * | e.g. 0 | e.g. 0 |
| Commission | calculated automatically | calculated automatically |
| Crossed-out price | optional | optional |
ℹ️ Units consumed = number of stock units deducted per ticket sold. At 1, an Adult ticket and a Child ticket each consume 1 spot from the shared stock.
💡 Add a quantity range allows tiered pricing (rates that decrease based on quantity).
- Save the price group.
- Price period list block: “Prices vary by time slot” = No by default. Fill in a period Name + Period (dates) if needed.
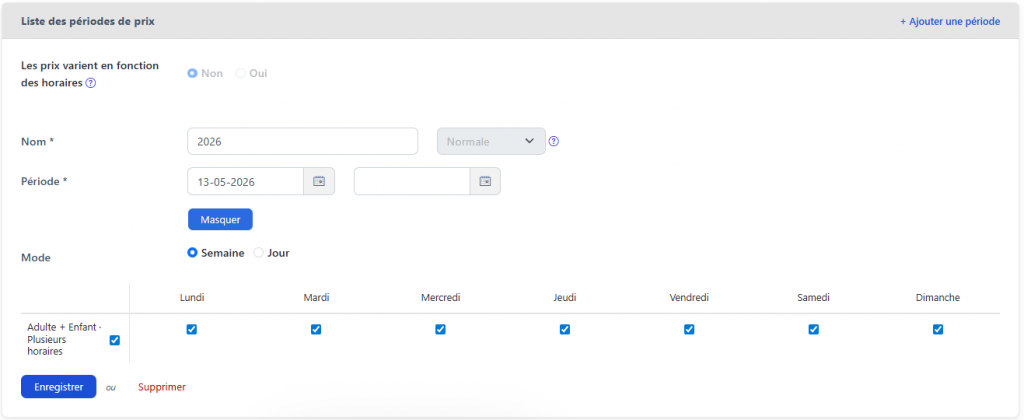
Step 4 — Create the SHARED STOCK ⭐ (key step)
Shared stock = a single pool of spots, common to all time slots and to both types (Adult/Child).
- Menu Activity › Product availability.
- Click + Add.
- On creation, only 2 fields appear:
- Name *: e.g. A4 – Adult + Child · Several time slots
- Supplier *: e.g. Les Bateaux Degiron
- Click Save. ✅ The detailed configuration only appears now.
- In Stock list › Add a stock, attach the Product created in step 1.
- Included price type: check that Adult and Child are both present (from step 3).
- Stock varies by time slot → Yes (required for a product with several time slots).
- Privatizable stock → No (unless you need private booking).
- Critical threshold *: the number that triggers the “critical stock” alert (e.g. 6).
- Name * of the stock period (e.g. 2026).
- Period *: start date (and end date if applicable).
- Fill in the stock grid (Time slots × Days): for each slot (9:00, 10:00, 11:00, 12:00) and each day (Mon → Sun), enter the number of spots. Example: 6 spots per slot, 0 on Wednesday.
- Click Save.
⭐ Shared stock: since a single stock is defined and attached to the product, all the spots entered are pooled between Adults and Children for the same time slot. An Adult sale and a Child sale draw from the same quota for a given slot.

Step 5 — Check the calendar (Stock Management tab)
- Still in the stock, open the Management tab.
- List of existing periods: select the period (e.g. 2026).
- View: switch between Calendar and Table.
- Color legend:
- ⚪ Open
- 🟧 Critical stock (≤ critical threshold)
- ⬛ Out of stock
- Adjust quantities day by day / slot by slot if needed, then Save.