Resources are the human and material means used to deliver your services: guides, drivers, vehicles, rooms, equipment. Once created, they can be assigned to the events on your schedule, and even assigned to each other.
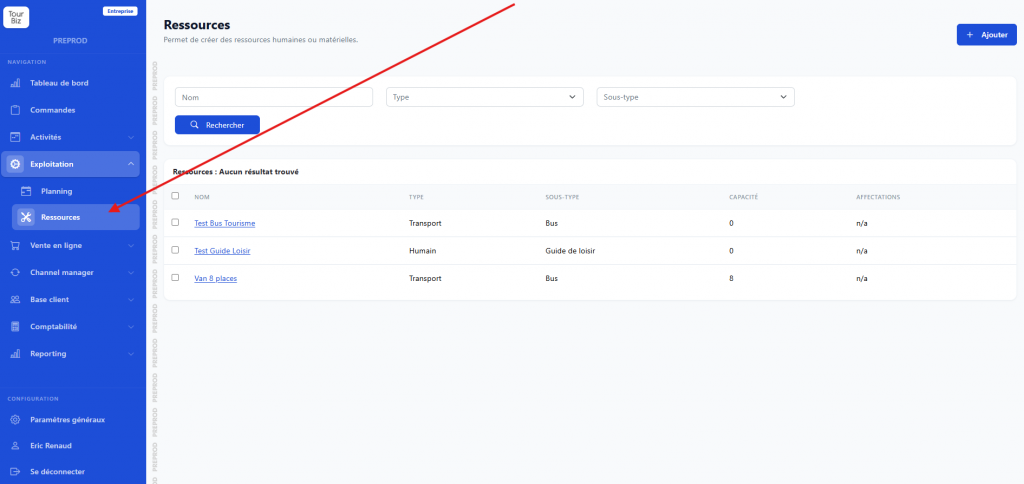
📍 Menu: Operations › Resources
Step 1 — Create a resource
On the Resources page, click + Add.
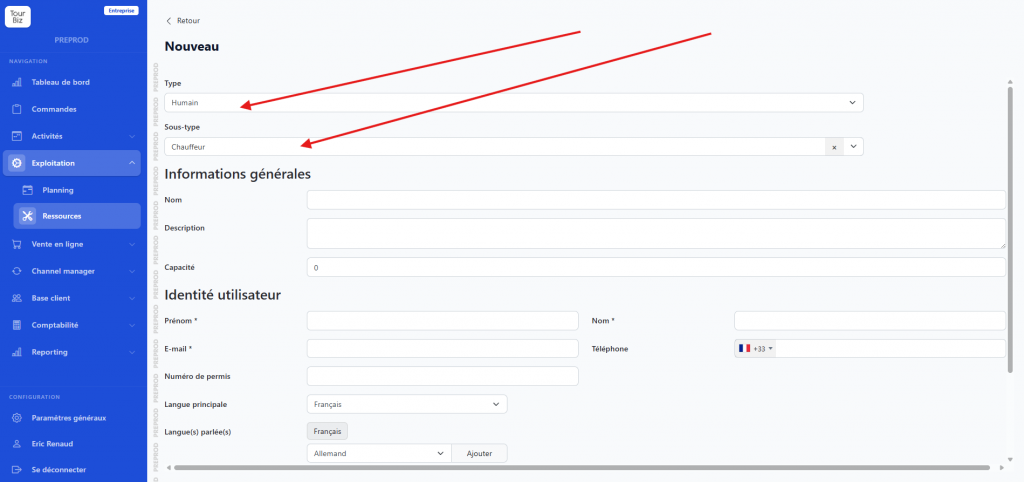
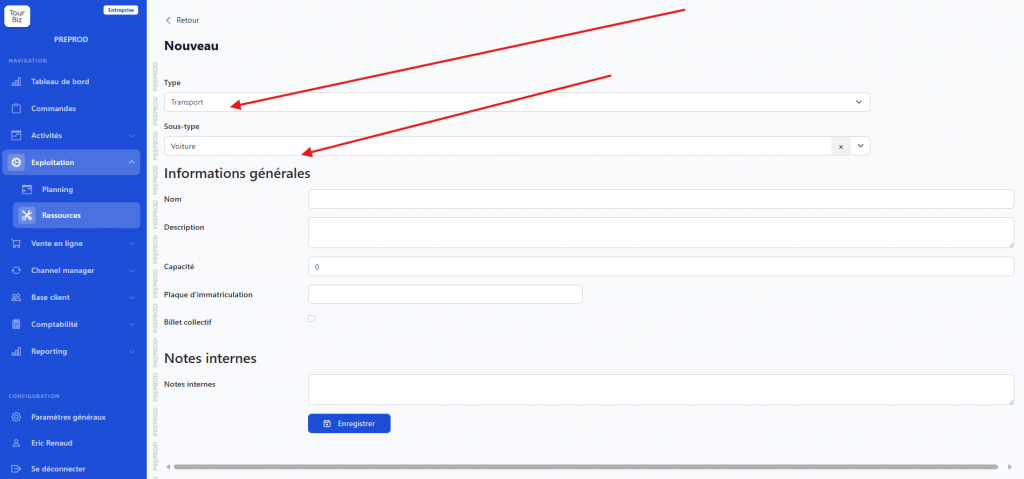
The first thing to choose is the Type — this choice determines the rest of the form: the fields shown vary depending on the selected type.
Four available types:
Type
Available subtypes
👤 Human
Activity guide, Driver, Chef, Host, Instructor
🚌 Transport
Bus, Car, Boat
🏠 Room
—
🔧 Equipment
—
After the type, you choose a Subtype, then the full form appears with the appropriate fields.
Human resources
The form has two main sections:
General information — name, description, capacity
User identity — first name, last name and email (required), phone, main language, spoken languages
💡 Key point — Each human resource created gets an individual login to the platform. The person can sign in to the schedule to view only the bookings assigned to them. So this isn’t just a descriptive sheet — it’s also the creation of a personal entry point into the schedule.
Transport resources
The form includes:
General information — name, description, capacity
License plate — field dedicated to the vehicle
Group ticket — checkbox specific to transport
💡 Key point — Group ticket — Once this option is enabled, the resource lets you generate the mandatory administrative document to present in case of an inspection by the DREAL (France). This ticket can then be managed from the schedule, both by the administrator and by the driver resource themselves via their own login.
Step 2 — Assign a resource to an event
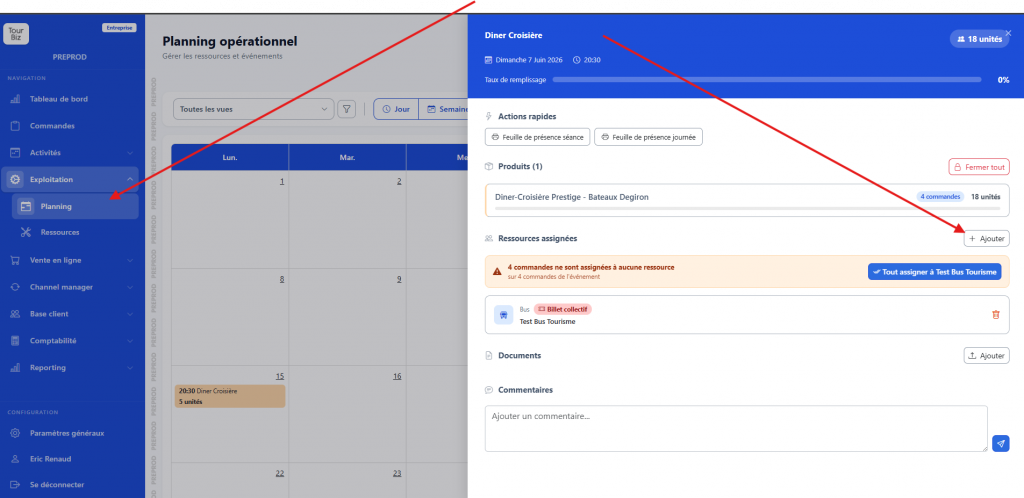
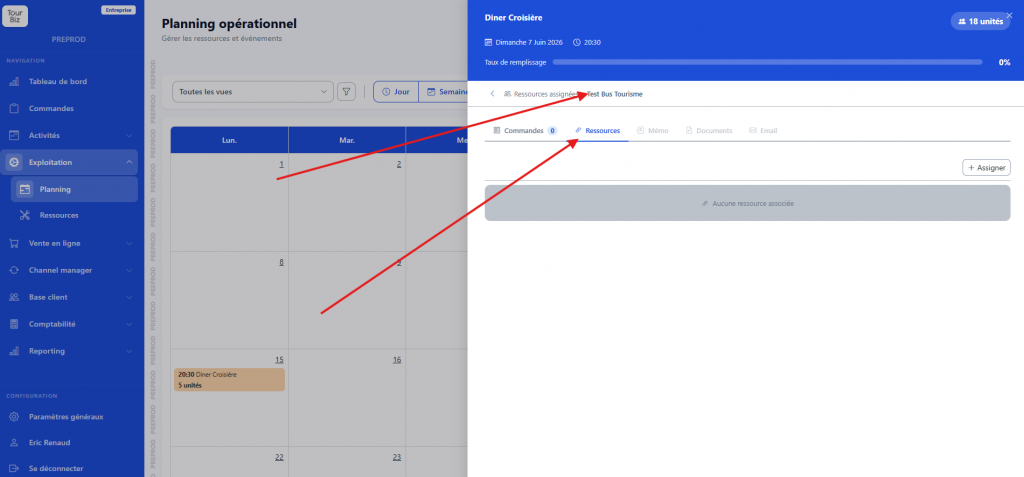
In the schedule, open an event
In the Assigned resources section, click + Add
Select in cascade: Type › Subtype › Resource
Click Assign
The resource appears in the list of assigned resources. You can remove it at any time.
Detail of an assigned resource
Clicking on an assigned resource opens its detail panel, organized into tabs:
Tab
Content
Bookings
Breakdown of customers on this resource
Resources
Resources attached to this resource
Memo
Internal notes
Documents
Related documents
Email
Sending emails from the resource’s context
Step 3 — Assign a resource to another resource
Resources can be assigned to one another — for example, attaching a driver to a bus.
From the detail of a resource assigned to the event, open the Resources tab
Click + Assign
Select in cascade: Type › Subtype › Resource
Click Assign
💡 This pairing lets you fine-tune the organization of your services: the same vehicle can be linked to its driver, a room to its host, etc.