The principle: one event = one product group
For services to appear on your operations schedule, you must first create a product group, which will form an event (or a service, if you prefer). A single event can bring together several products.
💡 Example — A dinner cruise is a single event, but it can be made up of one product for individuals and another for groups. These two products are brought together under the same group so they can be managed together on the schedule.
Step 1 — Create the product group
📍 Online Sales › Product groups
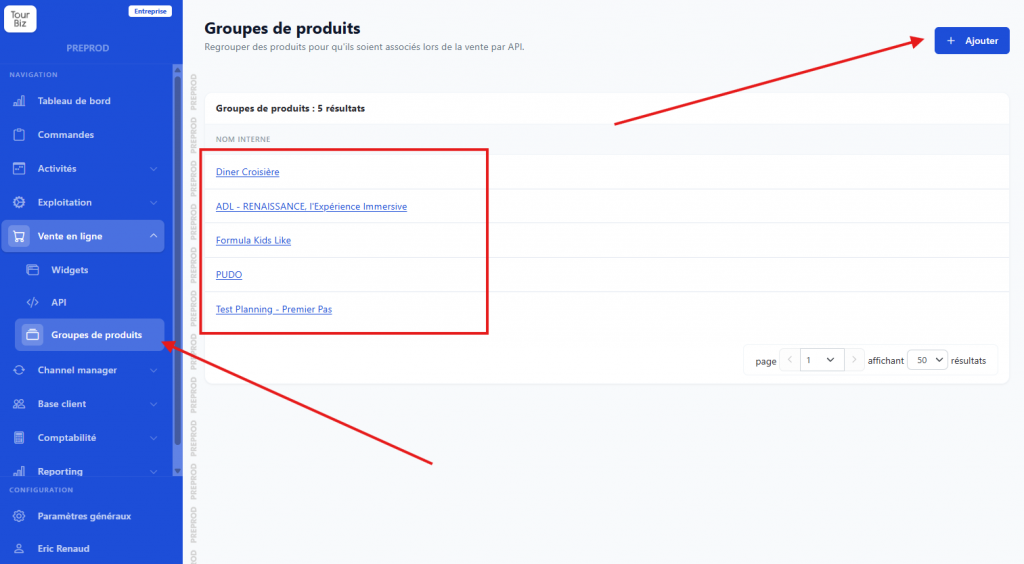
- The page lists the existing groups. Click + Add at the top right.
- Fill in the form fields:
| Field | Required | Description |
|---|---|---|
| Internal name | ✅ | Internal identifier for the group |
| Title | — | Visible to customers (translatable) |
| Description | — | Translatable into several languages |
| SKU | — | Optional product reference |
- In the Add a product to the group section, check the products to associate (sorted by supplier).
- Click Save.
ℹ️ Once saved, the Products in the group section appears. You can reorder products, add or remove them at any time.
⚠️ If you created the product group after already receiving bookings, those bookings won’t automatically appear on the schedule. You’ll need to re-save each relevant order for it to be taken into account.
Step 2 — Find the event on the schedule
📍 Operations › Schedule
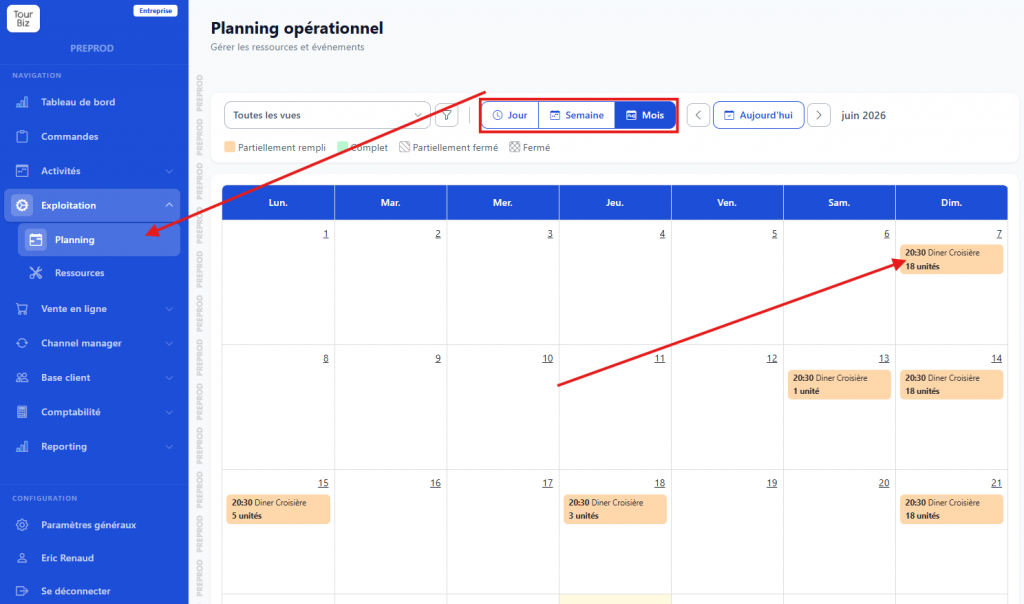
As soon as a booking is made on one of the group’s products, the event automatically appears on the schedule.
The calendar can be viewed in Day, Week or Month view, with arrow navigation and a Today button.
Color legend:
| Color | Status |
|---|---|
| 🟡 Partially filled | Spots are still available |
| 🔴 Full | No more spots available |
| 🟠 Partially closed | Some of the event’s products are closed |
| ⚫ Closed | All of the event’s products are closed |
Step 3 — Manage an event
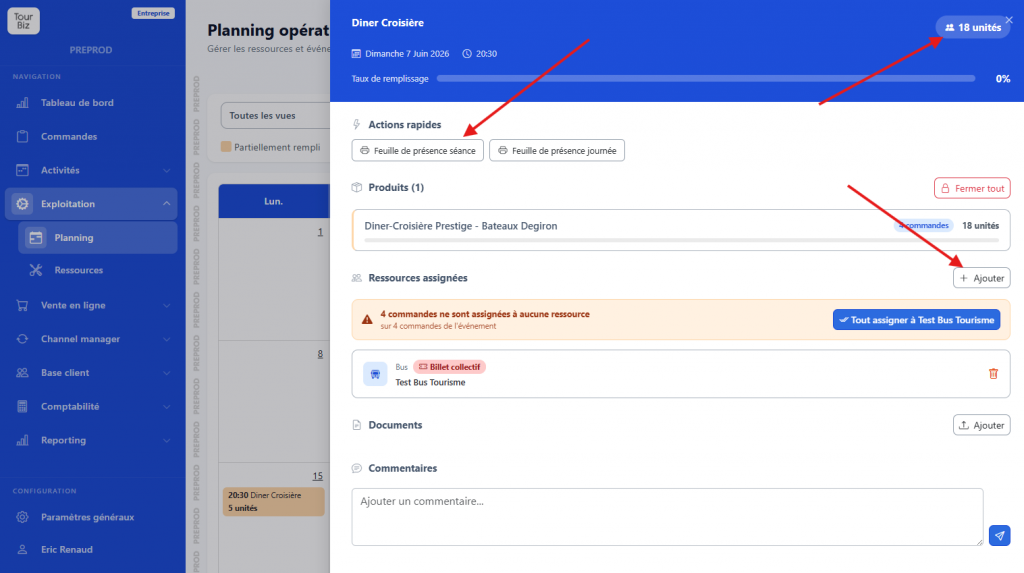
Click an event to open its detail panel. The header summarizes the name, date, time, number of units, and fill rate.
📋 View bookings
Each product shows its number of bookings. Clicking on it takes you to the booking details (customer, email, status, number of people) via the Bookings, Add, Stock and History tabs.
🖨️ Print the attendance sheet
From the Quick actions area, print an attendance sheet per session or per day.
🔒 Close / reopen products
- Close all — blocks sales on all the products for the service.
- Open all — reopens all the products.
👥 Assign resources
Via + Add in the Assigned resources section, assign human or material resources to the event.
⚠️ Resources must have already been created in
Operations › Resources(by type and subtype — e.g. a transport vehicle). A warning flags bookings not yet assigned to a resource.
📎 Add documents and comments
- Documents — attach files to the event.
- Comments — make team follow-up easier with internal notes.