Goal: custom filters let you tag orders with tracking indicators specific to your organisation (e.g. Supervisor, Anomaly, PAYMENT MISSING…). These coloured tags then appear in the order list and can be used to filter your portfolio.
1. Access custom filters
In the navigation menu, click General settings (bottom left, in the CONFIGURATION section).
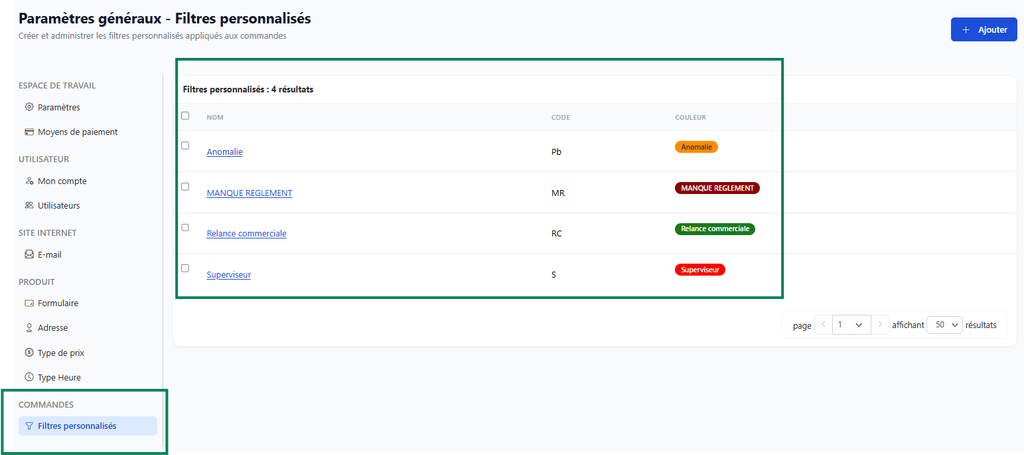
The page that opens lists all the configuration sections. Under the ORDERS section, click Custom filters.
You reach the filter management page. If no filter has been created yet, the list shows “No results found”.
2. Create a new filter
Click + Add at the top right.
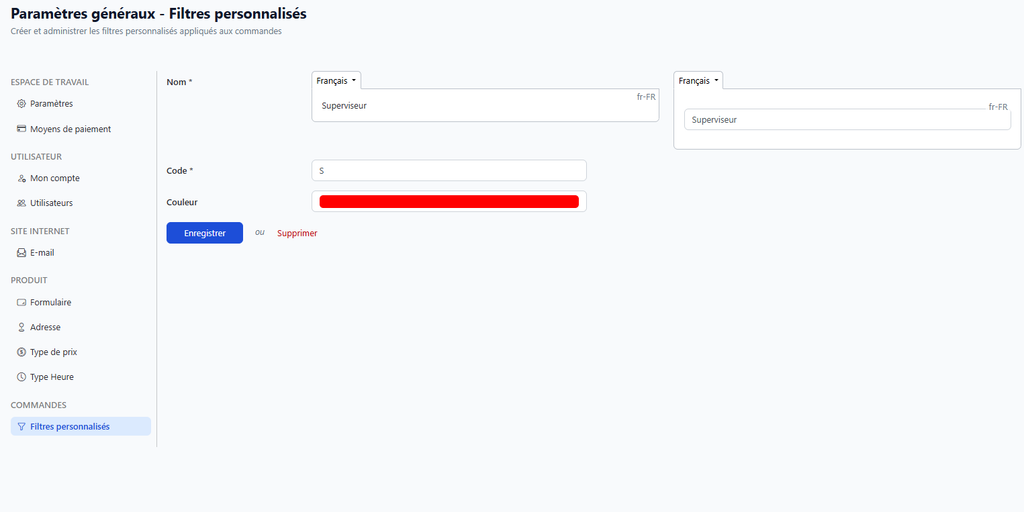
The creation form opens. It has three fields:
| Field | Description |
|---|---|
| Name | Filter label, shown on the coloured badge and in drop-down lists |
| Code | Short identifier (2-3 letters), visible in the Custom tracking column of the list |
| Colour | Badge colour (choose it with the colour picker) |
Examples of common filters:
| Name | Code | Suggested colour |
|---|---|---|
| Supervisor | S | 🔴 Red |
| Anomaly | An | 🟠 Orange |
| PAYMENT MISSING | PM | 🟥 Dark red |
| Sales follow-up | SF | 🟢 Green |
| Incoming transfer | IT | 🔵 Blue |
| To refund | RF | 🟡 Yellow |
| Question | Q | 🔵 Light blue |
| Off budget | OB | ⚫ Grey |
Fill in the fields and click Save.
3. Manage the list of filters
Once several filters have been created, the list shows all filters with their name, their code and a visual preview of the coloured badge.
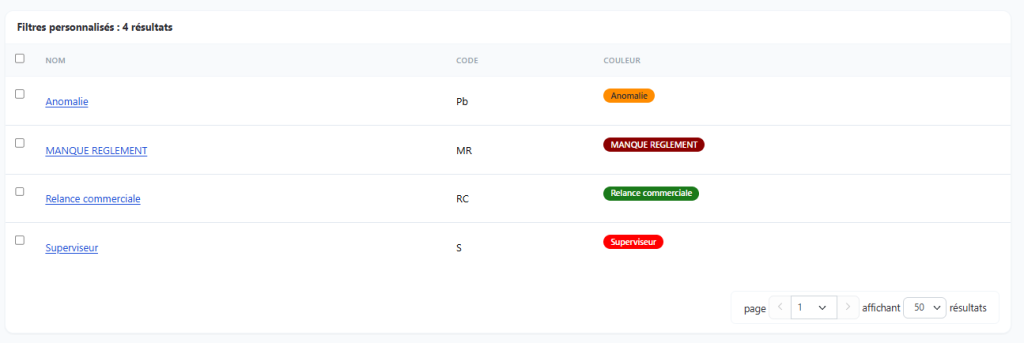
You can edit a filter by clicking on its name, or delete it from the edit page (Delete button).
4. Apply a filter to an order
Open an order record (Orders > click on the order number).
On the right of the record, in the Reference block, find the Custom filters field.
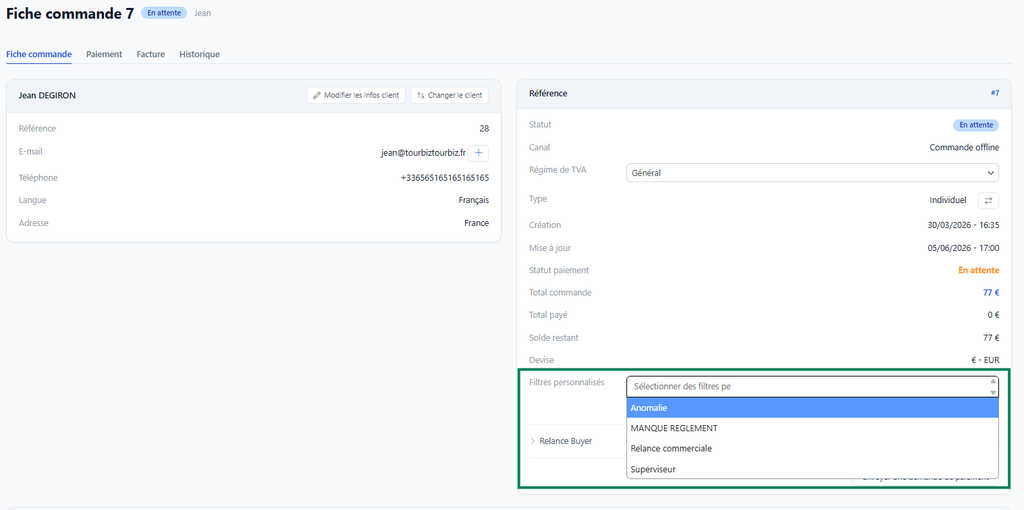
Click on the “Select custom filters…” field to open the drop-down menu. All the filters created appear in the list.
Select one or more filters. The coloured badge is displayed immediately in the field.
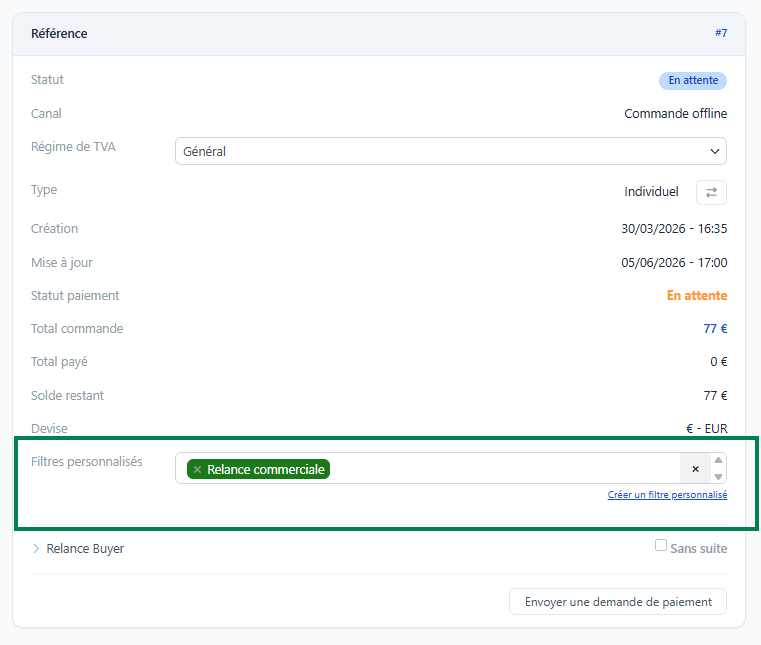
💡 Tip: you can apply several filters to the same order. Each badge is displayed with its own colour. To remove a filter, click the × next to the badge.
💡 Shortcut: the “Create a custom filter” link below the field takes you straight to the creation page without going through General settings.
The change is saved automatically as soon as you select — there is no “Save” button to click.
5. Use filters in the order list
In the order list (Orders > Bookings), the Custom tracking column shows the code of the applied filter as a coloured badge.
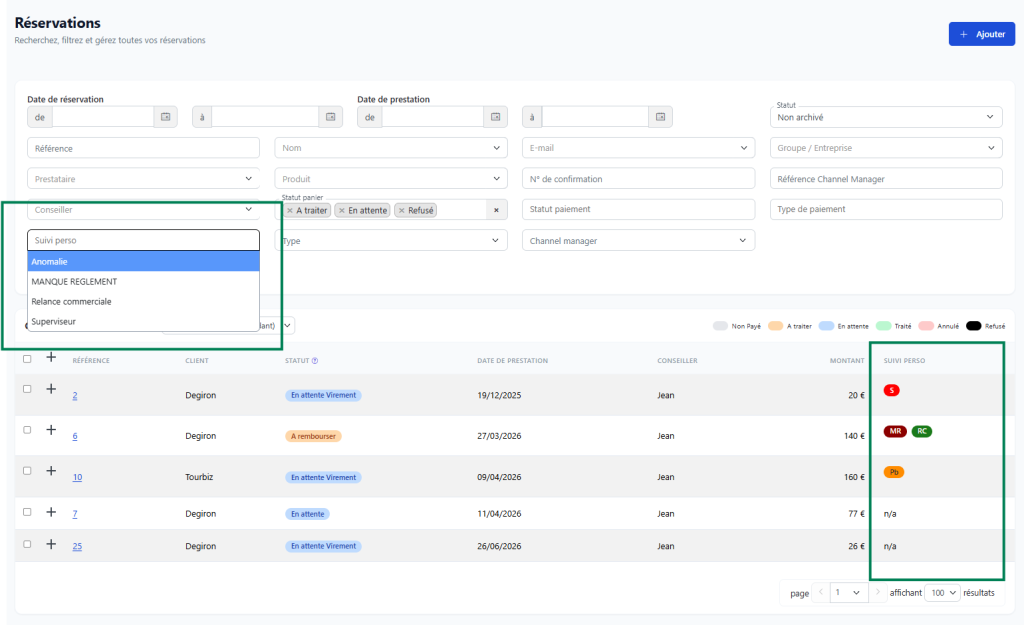
To filter orders by tracking, click + filters to show the extended filter panel. The Custom tracking field then appears in the search options.
Enter the name or code of the filter in the Custom tracking field, then click Search to display only the orders with that tracking.
6. Summary of the complete flow
General settings
  └── Orders > Custom filters
        └── + Add
              ├── Name: e.g. "Supervisor"
              ├── Code: e.g. "S"
              └── Colour: e.g. red
                    └── Save

Orders > Order record
  └── Reference block > Custom filters
        └── Select one or more filters
              └── Coloured badge displayed automatically

Orders > Booking list
  └── "Custom tracking" column → badge visible
  └── + filters > "Custom tracking" field → filter by tag