Goal: create the parent product (the product sold to the customer), set up its selling prices, then link components to it in exclusive blocks.
Prerequisite: the components must exist in the Component catalogue (see Block 1).
1. Create the parent product
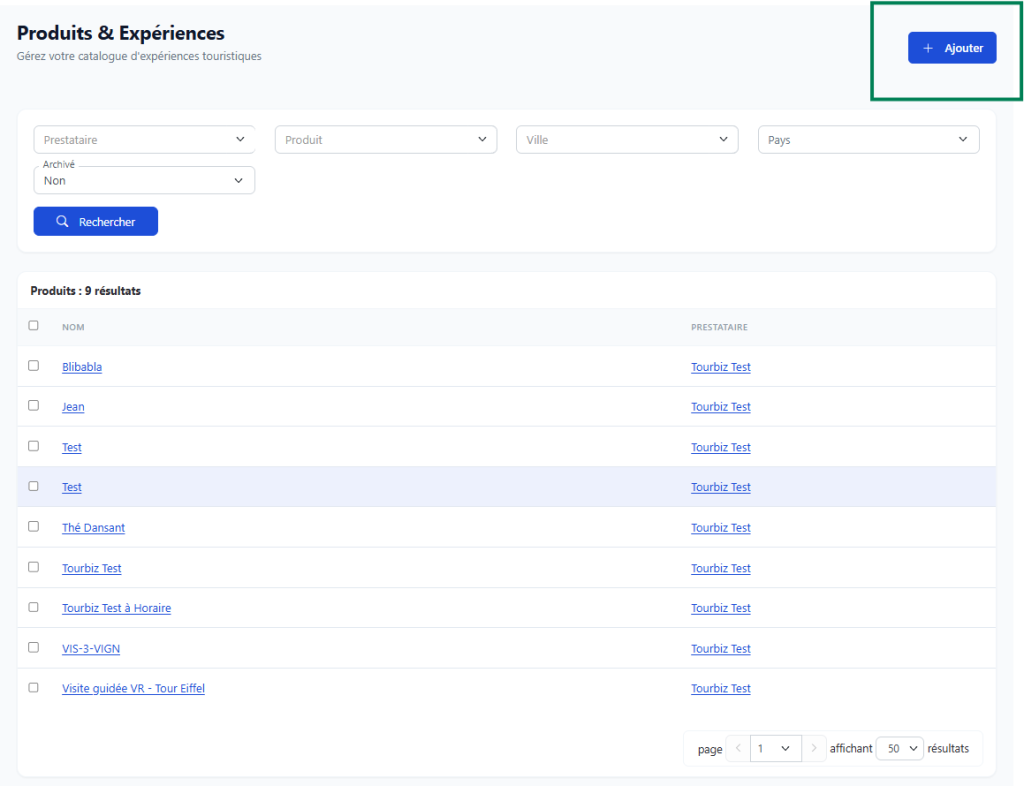
The parent product is created exactly like a normal product: in Activities > Products, click + Add.
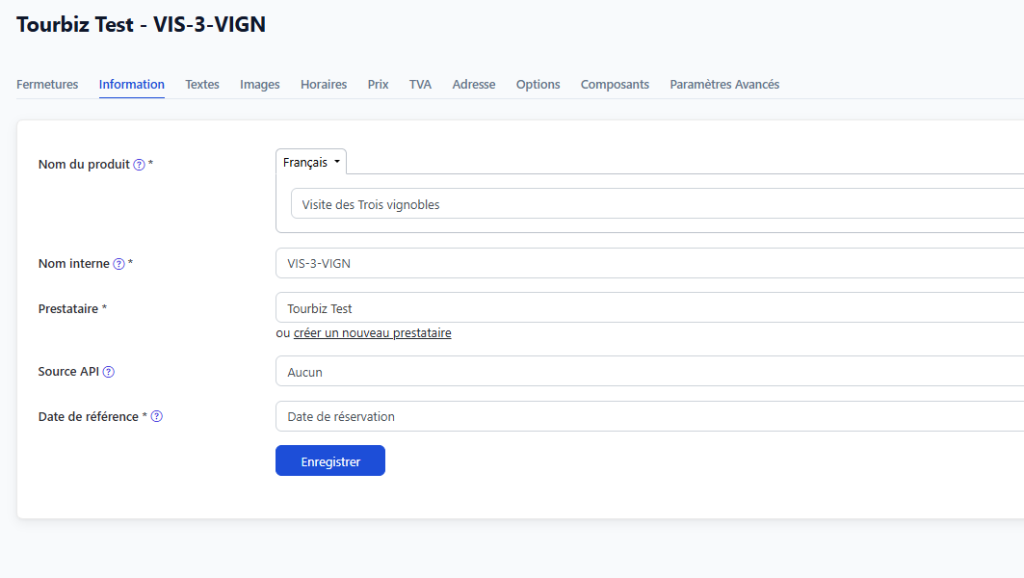
Fill in the usual tabs:
| Tab | What to do |
|---|---|
| Information | Product name (e.g. Three vineyards tour), supplier |
| Prices | Public price and selling price — this is where you define what the customer pays |
| VAT | VAT on selling prices |
| Times | Time slots available for sale |
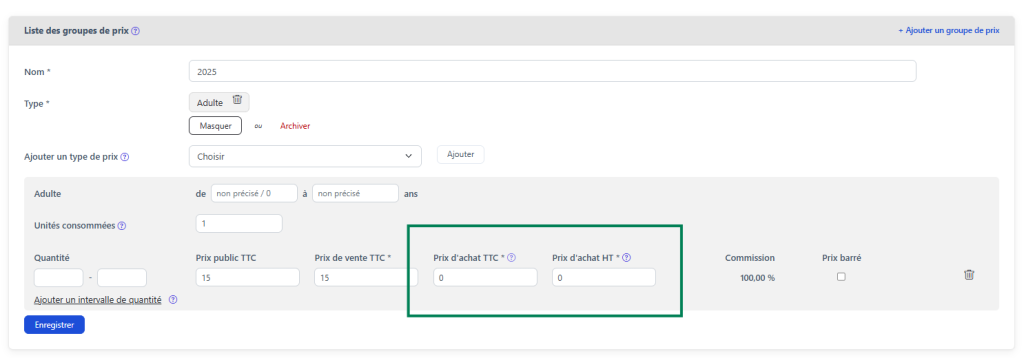
⚠️ Purchase price of the parent product: leave at 0
On the Prices tab of the parent product, do not fill in the Purchase prices (leave them at 0). The actual purchase cost will be calculated from the components actually chosen in operations — not from the parent product.
⚠️ Price types must match the components
The price types of the parent product (Adult, Child, Group…) must be identical to those set up on the components.
Why? When a component is selected in operations, Tourbiz matches the quantities sold (e.g. 3 Adults) with the component’s purchase rates by type. If the parent product sells Adults but the component only has Group rates, the cost calculation will be wrong.
2. Save, then go back into edit mode
Once all the tabs are filled in, click Save.
💡 Important: the Components tab is not available during initial creation. It only appears when you come back to edit the product after saving it a first time.
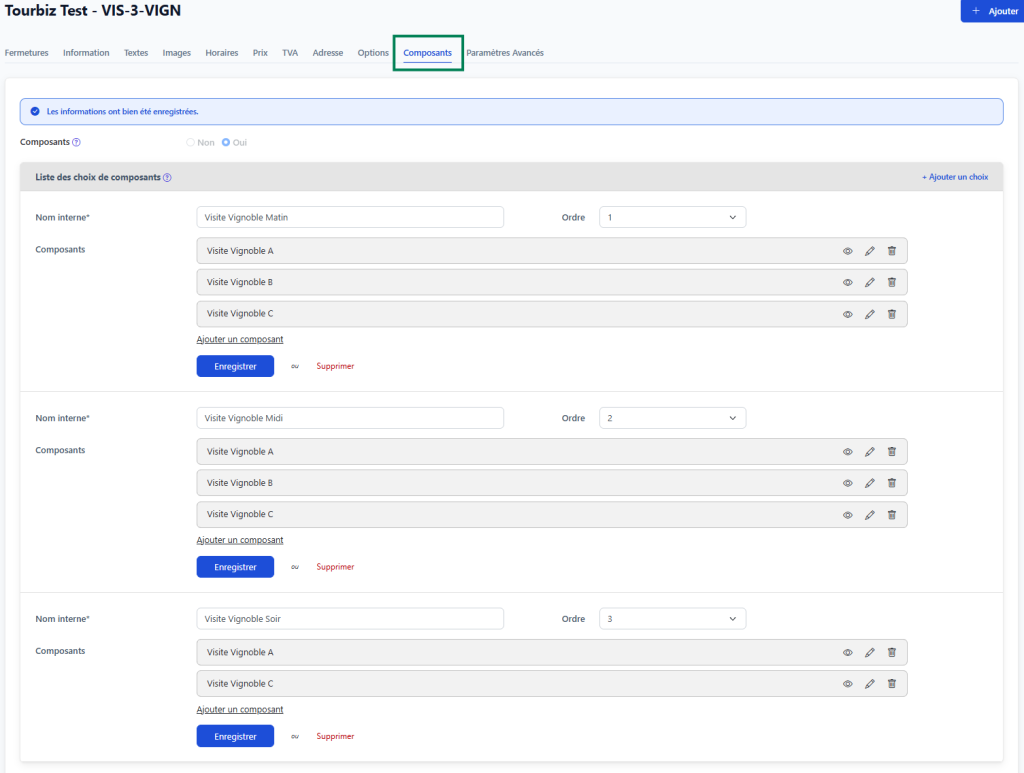
From the product list, click on the product name to reopen its record in edit mode. The Components tab is now available in the navigation bar.
3. Enable components
Click on the Components tab. By default, the Components field is set to No.
Switch it to Yes. The List of component choices section appears, with the + Add a choice button at the top right.
4. Create the component blocks
Each block represents a slot in the day’s programme. For a Three vineyards tour, you create 3 blocks: morning visit, midday visit, evening visit.
💡 The components of a single block are exclusive: the operator will choose only one when planning (either Vineyard A, Vineyard B or Vineyard C for the morning visit).
Click + Add a choice to create the first block.
For each block:
1. Enter the Internal name — this label is only visible internally (e.g. Morning vineyard visit).
2. Set the Order — determines the display order of the blocks in operations (1 = displayed first).
3. Add the components — click Add a component to choose the alternatives for this block from the Component catalogue.
4. Click Save — each block is saved independently.
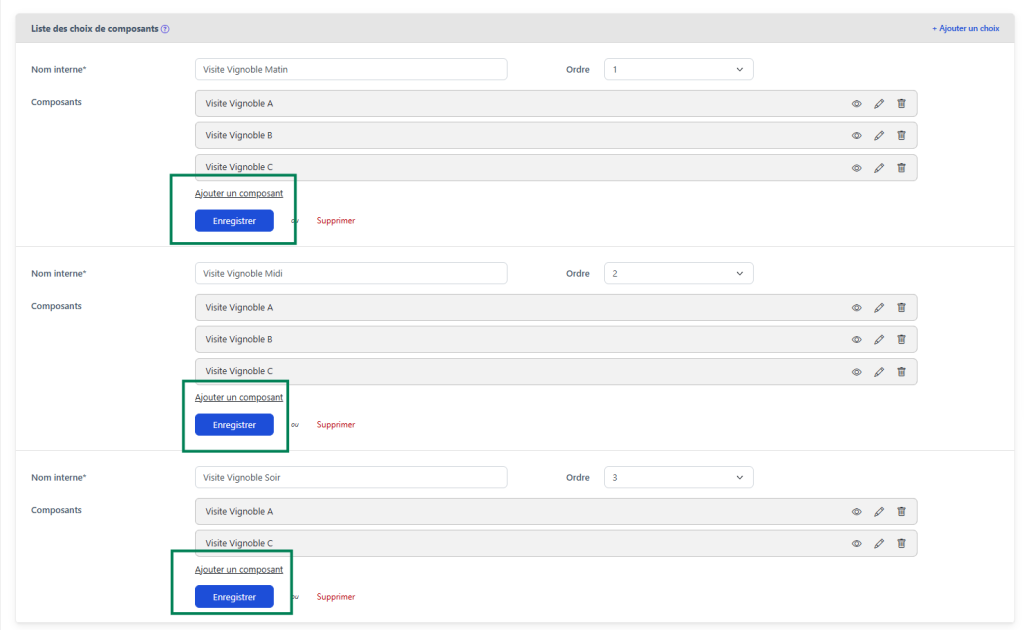
Repeat for each additional block by clicking + Add a choice again.
5. Complete example — Three vineyards tour
| Block | Order | Available components |
|---|---|---|
| Morning vineyard visit | 1 | Vineyard A, Vineyard B, Vineyard C |
| Midday vineyard visit | 2 | Vineyard A, Vineyard B, Vineyard C |
| Evening vineyard visit | 3 | Vineyard A, Vineyard C (Vineyard B closed in the evening) |
💡 The same component can appear in several blocks. Vineyard A is in all 3 blocks: if it is the one available all day, the operator can assign it in the morning, then Vineyard B at midday, etc.
💡 Each block can have a different number of alternatives. In the example, the Evening block only has 2 options because Vineyard B is not available in the evening.
Flow summary
Activities > Products > + Add
  ├── Information : Name, Supplier
  ├── Prices      : Public price + Selling price
  │                 Purchase price = 0 (calculated from the components)
  │                 ⚠️ Price types = same as the components
  ├── VAT, Times, etc.
  └── Save

→ Reopen the product in edit mode

Components tab
  └── Components = Yes
        └── + Add a choice (one block per programme slot)
              ├── Internal name : e.g. "Morning vineyard visit"
              ├── Order : 1, 2, 3…
              ├── Add a component → choose from the catalogue
              └── Save (per block)
Next step → Block 3: assign components in operations.